Fee Plus Appointments is a smart feature that allow your customer to make an appointment booking 24/7. It is your digital assistance showing your customer the available employees, time slots, and location when they make the booking online.
Your customer can logged into your Fee Plus Business App – via web link https://fee.plus/{business_username}/app, and click on the “Make Appointment” button, or go to https://fee.plus/{business_username}/booking if they have a Fee Plus account to make the appointment booking with you.
Below I’ll show you what information is presented to your customer and how they book the appointment via Fee Plus.
- Selecting an appointment
- Selecting passes to be used for the selected appointment
- Selecting an employee in charge
- Selecting a time slot
- Selecting a location
- Summary & booking the appointment
Step 1: Selecting an Appointment
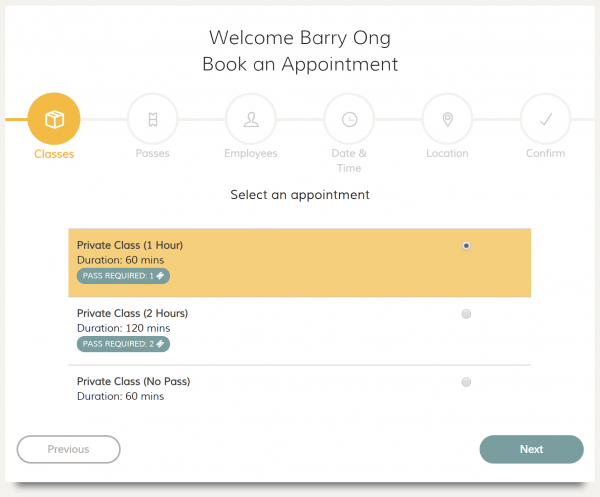
First, your customer will need to select the appointment that he wants to book. This appointments list can be created in the Appointments Master Record in your Administrator Console.
Step 2: Selecting Passes To Be Used For The Selected Appointment
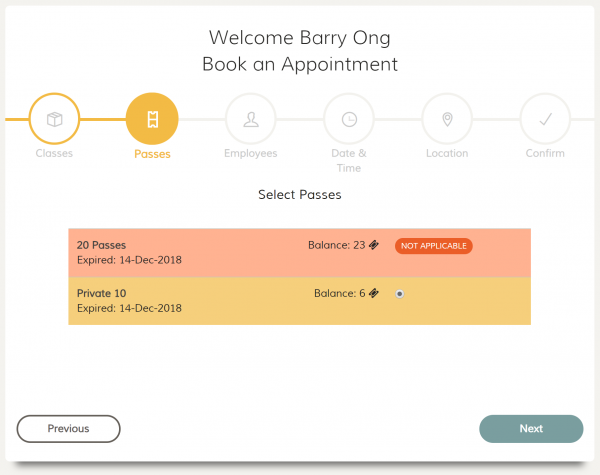
If the appointment that the customer selected requires pass, customer will then be shown the available passes that he has purchased from you in the next page. You can restrict which passes that the customer can use for the appointment.
In the screen example above, the Private Class (1 Hour) can only be used with the Private 10 passes. Where as the 20 Passes passes cannot be used for the selected appointment and customer will not able to select it.
Step 3: Selecting An Employee In Charge
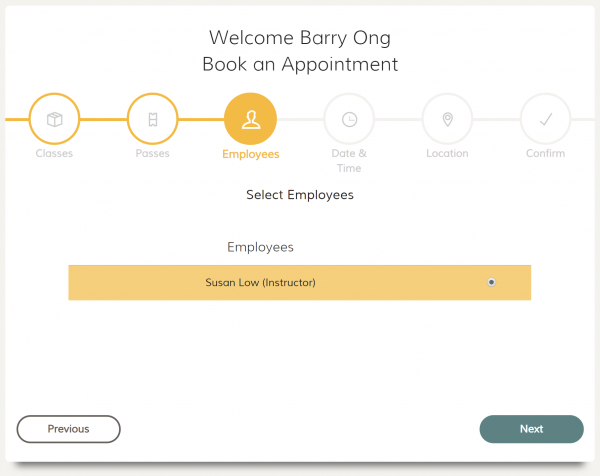
Once the customer has selected the passes to be used for the appointment, he can now chose which employee to service them. This list can be restricted as well in the appointment master record, or the service customer for the passes that he subscribed to.
Step 4: Selecting A Time Slot
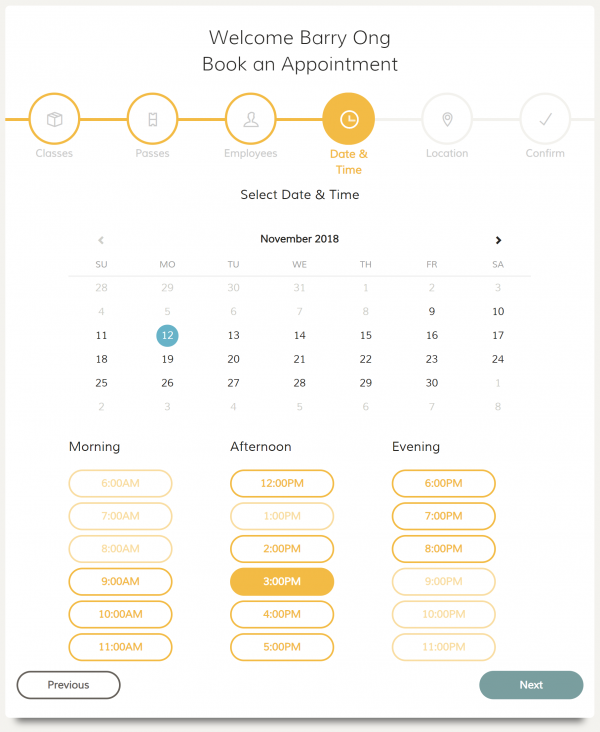
Next, customer will be choosing the time slot that is convenient for him. The date and time showing here is base on the setting you made and available time of the selected employee.
Date Restriction
You can notice that the allowable date selection is only starts from 9th of November 2018. The date that this screen is captured is 7th November 2018. This is because this appointment is set to only allow to book starts 2 days after.
Time Restriction
The available time shown is base on several factors:
Business’ Working Hours – the business working hour for the example above is from 9am until 9pm. Hence you will see that the time slot available is within the time frame.
Employee’s Working Hours – some times, employee has their own working hours on top of the business working hours. Such as multiple shift or part timer. Hence, each employee can be set with their respective working hours in their Administrator Console record.
Employee’s Free Time – customer can only select employee’s free time slot. In the example above, customer cannot select 1pm time slot because the selected employee is not free.
Step 5: Selecting a Location
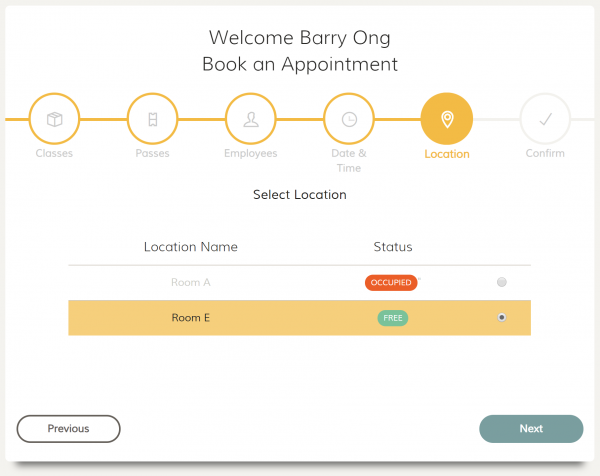
Lastly, your customer will need to select the location for the appointment. This option can be disabled, or limited to several chosen locations in the Appointment Master Record.
Fee Plus will only allow the available location base on the time slot that the customer selected. For the example above, customer cannot select Room A because it is already occupied in another event.
Step 6: Summary & Booking The Appointment
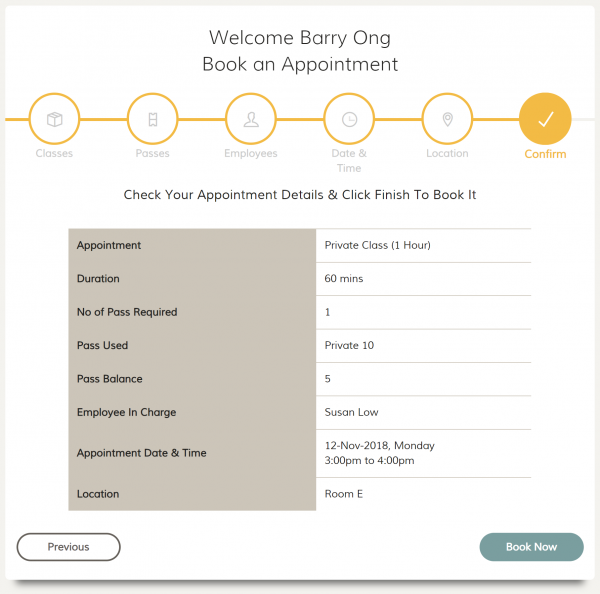
At the end of the wizard, customer will be presented with the summary of the selected appointment options. Once customer confirm the details and click on the “Book Now” button, you will see the appointment booking request in your Administrator Console.
You will need to approve, or reject the request to finalize the process.