To enable FeePlus to connect with LHDN and validate your company’s e-invoices, you’ll need to add FeePlus as an intermediary in your MyInvois Portal company’s Taxpayer Profile.
Tip: Follow step by step, or skip ahead to the part you need.
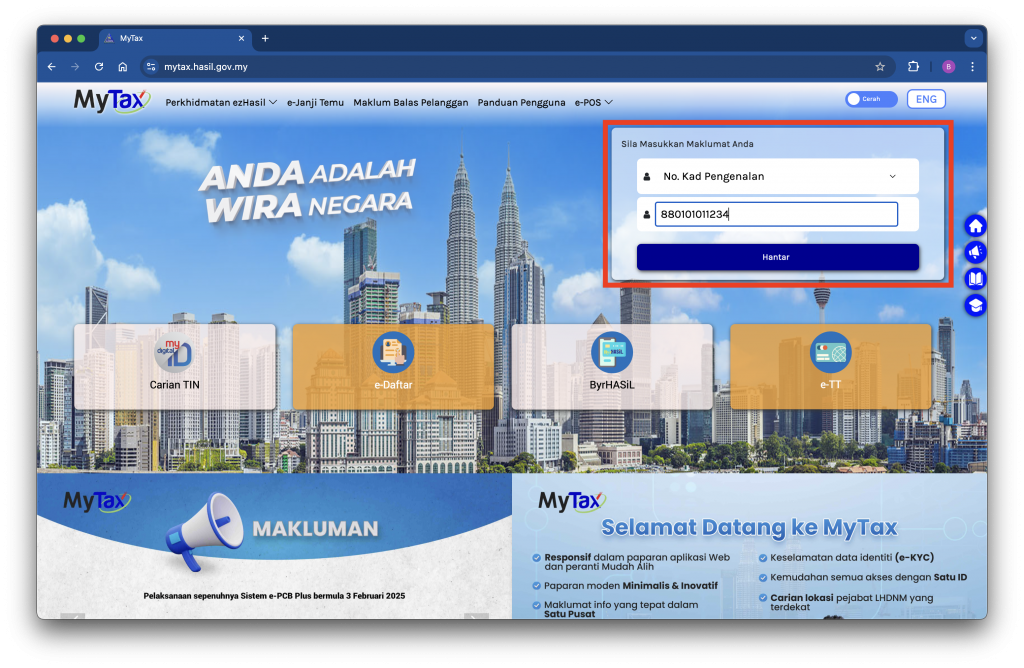
Step 1: Login to your MyTax account
Visit https://mytax.hasil.gov.my and sign in using your credentials — typically your Identification Card Number and password.
Step 2: Access the MyInvois Portal
Once signed in, click the MyInvois menu at the top of the MyTax main page.

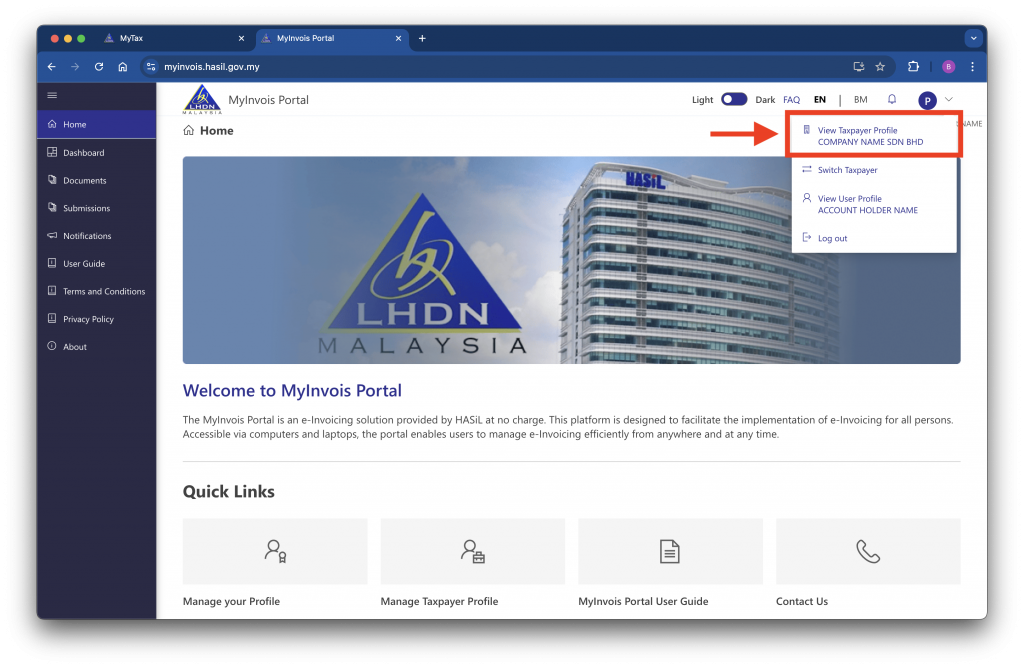
Step 3: View Your Taxpayer Profile
Click the Profile icon at the top right of the MyInvois Portal, then select View Taxpayer Profile.
Note:
- If the company name shown is not the one you wish to authorize FeePlus for, click Switch Taxpayer. You’ll be redirected to a selection page — choose the correct company and repeat Step 3.
- If the company is not listed, you’ll need to add it to your MyTax account first. (Insert link to guide on adding a company to MyTax)
Step 4: Add FeePlus as Your Intermediary
In your company’s Taxpayer Profile page, scroll to the Representatives section and click Add Intermediary.
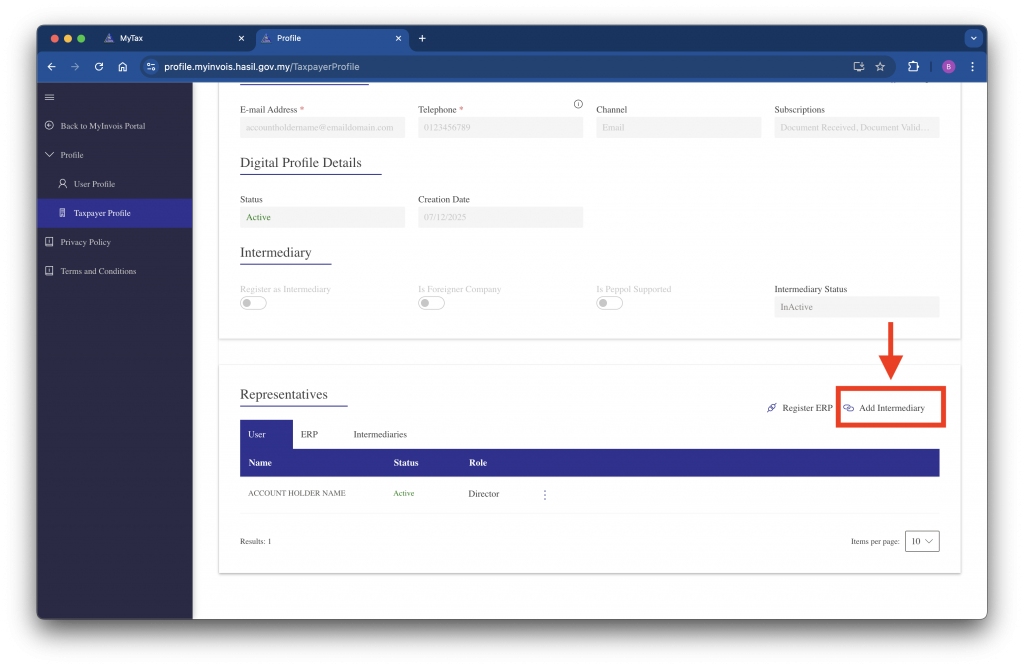
Note: If the Representatives section is empty, check that you’re signed in under an Employer account or that the MyInvois Appointment Type is enabled.
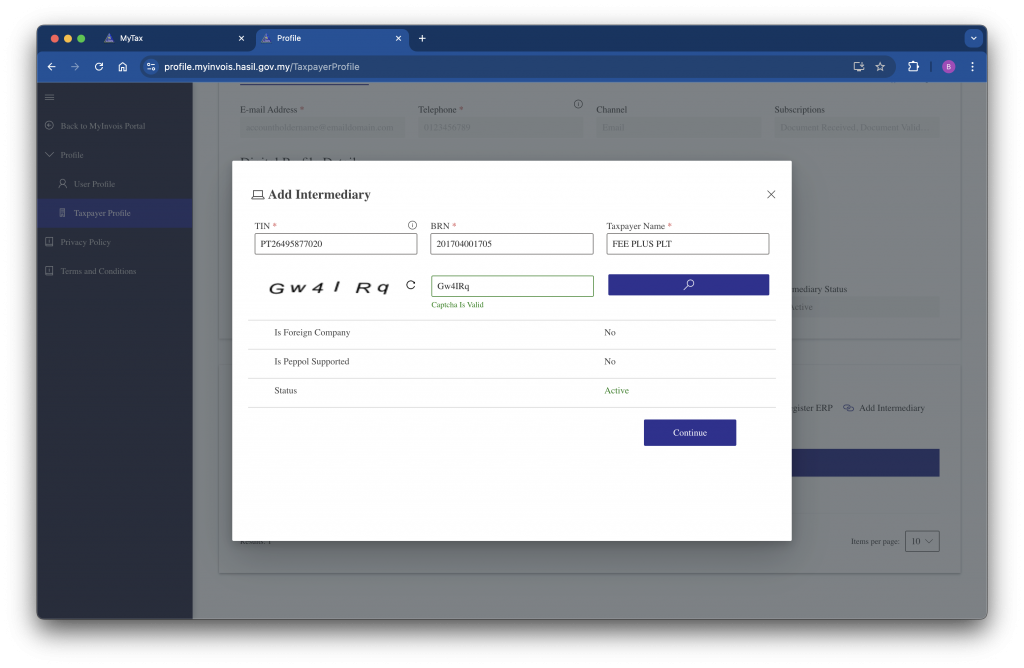
Enter the following details:
| TIN | BRN | Name |
|---|---|---|
| PT26495877020 | 201704001705 | FEE PLUS PLT |
Type the Captcha code and click Search. When you see the status Active, click Continue.
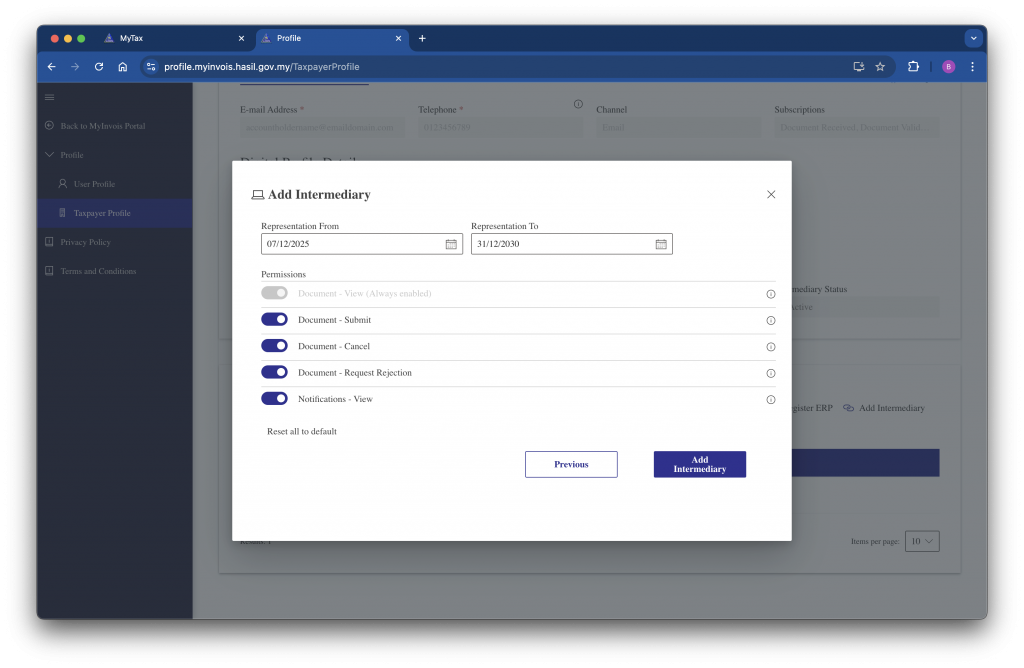
Step 5: Set Authorization Duration & Permissions
- Set Representation From to today’s date
- Set Representation To to 31/12/2030
- Toggle ON all permissions as shown in the screenshot below
- Click Add Intermediary
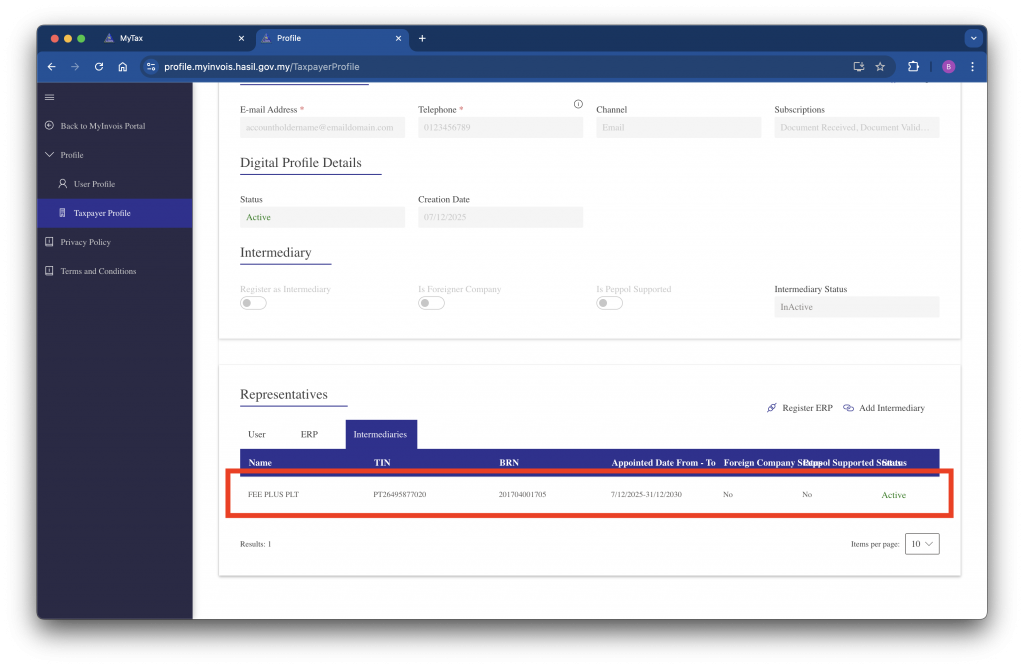
Step 6: Confirm FeePlus Has Been Added
Return to your company’s Taxpayer Profile in MyInvois Portal. Under the Representatives section, go to the Intermediaries tab. If you see FEE PLUS PLT listed, the setup is complete — FeePlus is now your authorized intermediary to validate invoices issued in FeePlus.
Next: [Configuring the MyInvois intermediary connection in FeePlus →]