Introduction
Welcome to FeePlus! This guide will walk you through the steps to set up e-invoicing, ensuring smooth validation and submission of invoices.
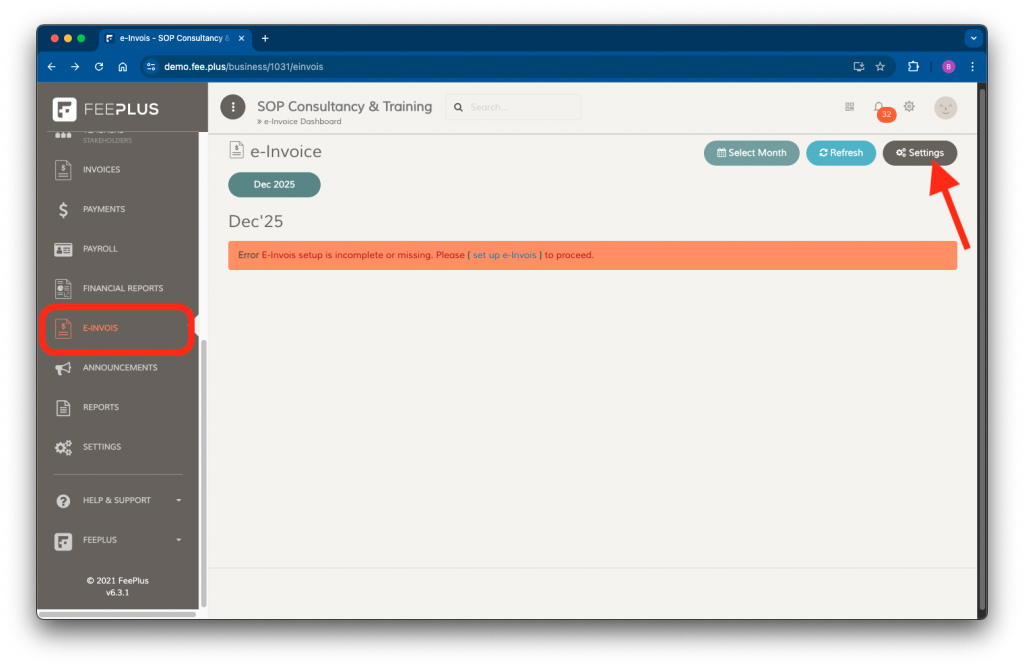
Step 1: Accessing E-Invoice Settings
- Log in to your FeePlus account.
- In the business administrative console, navigate to E-Invois > Settings.
NOTE: If you are unable to see the E‑Invois menu, try going to Home and selecting Refresh Businesses List. If the menu still does not appear, the module has not been activated for your business. Please contact us to enable it.
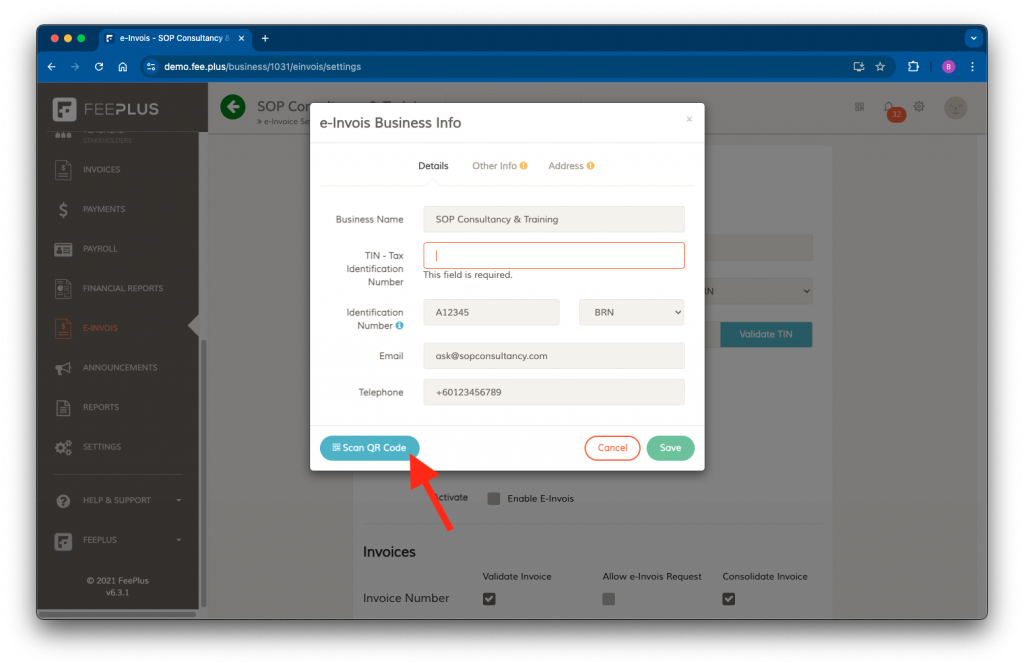
Step 2: Configuring Business Detail
In the E-Invois Settings page, go to Edit Business Info and enter the required information in the following tabs:
📝 Details Tab
- Business Name – Enter the official registered name.
- Tax Identification Number (TIN) – Required for e-invoice intermediary connection setup.
- Business Registration Number (BRN) – Select BRN as the identification type.
- Email address – Provide your primary contact email.
- Telephone Number – Include the official business phone number.
📄 Other Info Tab
- SST Registration Number
- Tourism Tax Registration Number (if applicable)
- MSIC Code
- Business Activity Description
📌 Note: You can refer to the LHDN MSIC Codes reference table to find your business MSIC Code and activity description.
📍 Address Tab
- Registered Business Address
- Select State & Country
🔹 Ensure all details match official records to prevent validation errors.
✔ Click Save to confirm the changes.
Step 3: Setting Up Sandbox Intermediary Connection
You can setup a sandbox intermediary connection If you want to test invoice validation before full implementation.
Pre-requisites
🔹 You must have a registered pre-production (preprod) MyInvois Portal account to enable the sandbox environment.
Adding FeePlus as an Intermediary in MyInvois Portal
In your preprod MyInvois Portal account, add FeePlus as an intermediary in the Taxpayer Profile using the following details:
| Name | TIN | BRN |
|---|---|---|
| FXXX_XXXXUS PLT | PT26495877020 | 201704001705 |
Configuring Sandbox Settings in FeePlus
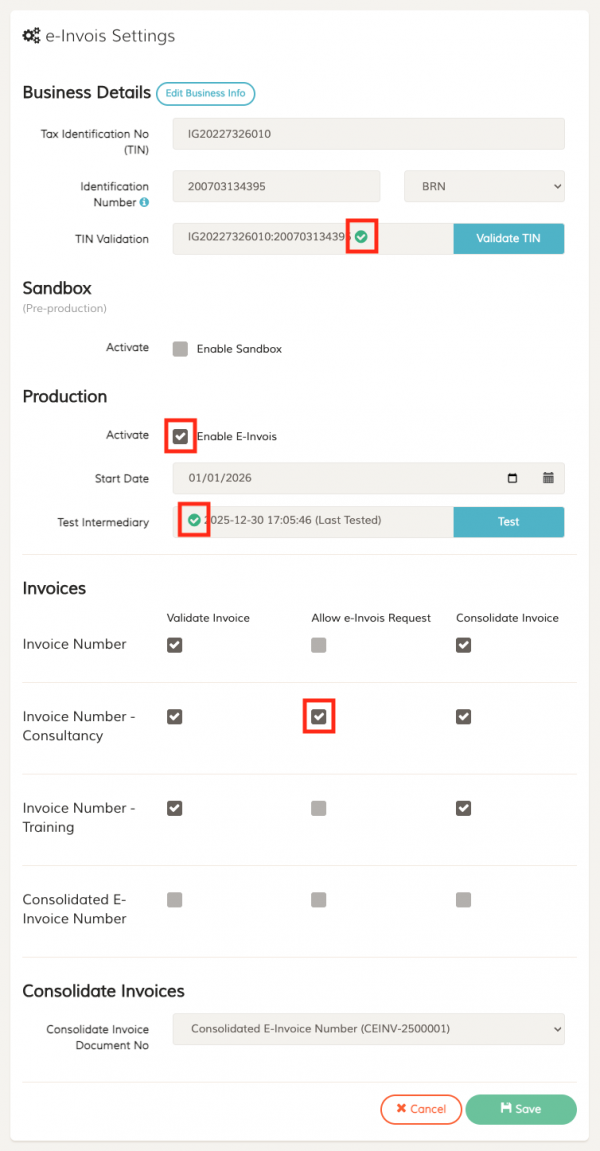
- In the E-Invois Settings page, enter your Business TIN and BRN.
- Click Validate TIN before proceeding.
- Check Enable Sandbox to activate the environment.
- Select the start date for sandbox testing.
Any invoice submitted after the sandbox start date can be validated. - Click Test to verify the connection.
- Click Save to activate the sandbox environment.
Step 4: Setting Up a Production Intermediary Connection
To allow FeePlus to connect with LHDN and validate your company’s invoices, you must first add FeePlus as an intermediary.
Pre-requisites
🔹 You must have a registered MyInvois Portal account and have set up your MyInvois Portal Taxpayer Profile.
Adding FeePlus as an Intermediary in MyInvois Portal
In your MyInvois Portal > Taxpayer Profile, add FeePlus as an intermediary with the following details:
| Name | TIN | BRN |
|---|---|---|
| FEE PLUS PLT | PT26495877020 | 201704001705 |
Configuring Production Settings in FeePlus
- In the E-Invois Settings page, enter your Business TIN and BRN.
- Click Validate TIN before proceeding.
- Check Enable E-Invois to activate production.
- Select the start date for e-invoice implementation.
- Click Test to verify the connection.
- Click Save to confirm the changes.
Step 5: Selecting Invoices Group for Validation
You can select which invoices to validate and disable those that don’t require validation.
Configuring Invoice Settings
In the E-Invois Settings page, navigate to Invoices and select from the following options:
✅ Validate Invoice – Allows submission to LHDN for e-invoice validation.
✅ Allow E-Invois Request – Lets customers request validation via invoice links or the FeePlus app.
✅ Consolidate Invoice – Enable invoice consolidation for the invoice group.
✔ Click Save to apply the settings.
Step 6: Setting Up a Consolidated Invoice Document Number
You need to assign a document number if you plan to consolidate invoices. This consolidated‑invoice document number is automatically created the first time you open Settings. The steps below are only needed if you want to create one manually.
Create New Document Number
- In Settings – navigate to Document Number Settings.
- Click Create New.
- Name it “Consolidated Invoices” (or any preferred label).
Assigning the Document Number to Consolidated Invoices
- in e-Invois Settings page, scroll down to Consolidate Invoices.
- Select the document number you created.
- Click Save to confirm.
Summary
The screenshot below highlights the key items you should review to ensure your setup is complete. The numbering follows the red‑boxed markers from top to bottom:
- Confirm that your TIN number has been successfully validated.
- Ensure the E‑Invois production environment is enabled.
- Verify that the E‑Invois intermediary connection has been tested.
- Enable any invoice groups that you want to allow customers to validate on their own.
Need Help?
If you experience any issues during setup, feel free to contact our support team.