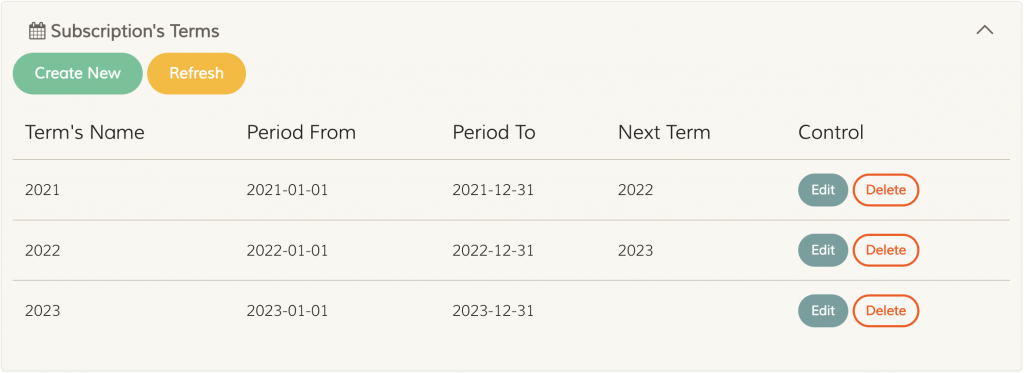
Subscription’s terms is the period a subscription fall into. Assigning a term for subscriptions will easily distinguish the period a certain subscription is active in. It is also a pre-requisite for upgrading a subscription in bulk.
Table of Contents
Creating a Term
We will walk you through detailed steps below to create terms correctly.
First, go to Settings, then click to open the Subscription’s Terms panel. Click Create New to create your first term.
Create Your First Term
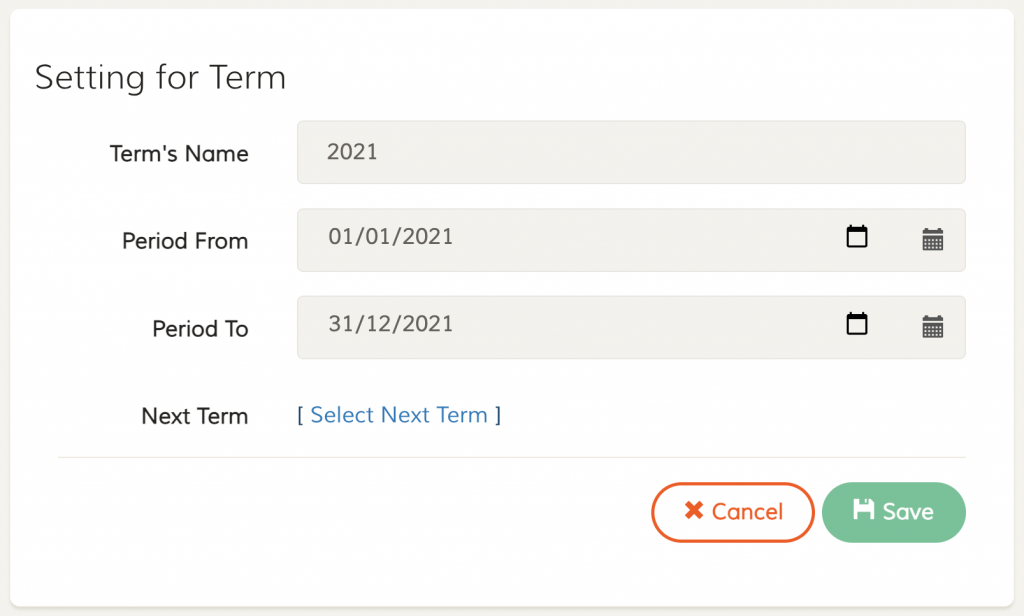
Fill in the term’s name, date period from and to, and click Save to create your first term.
Create Your Second (Next) Term
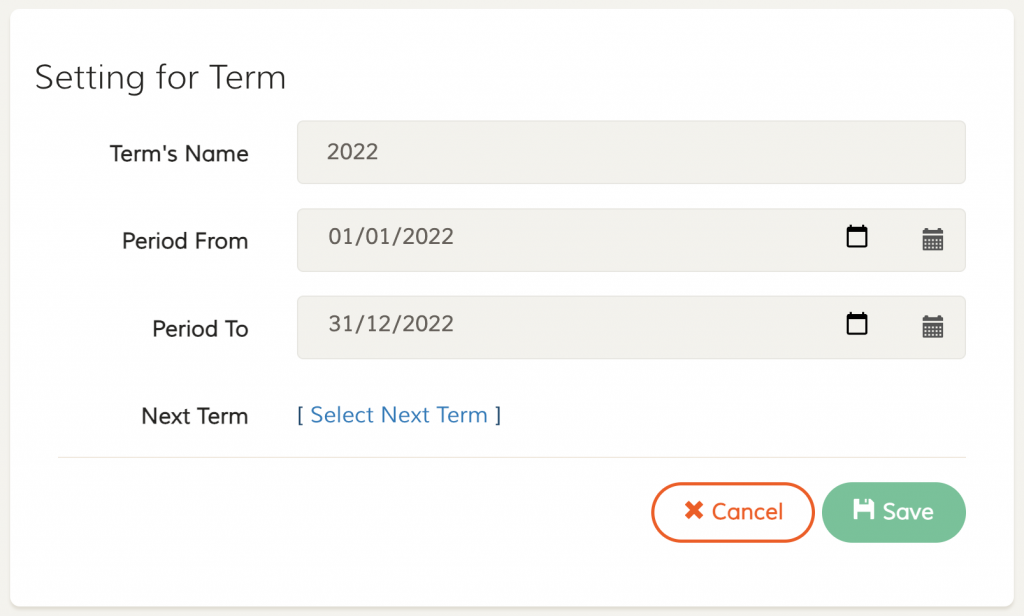
Next, click Create New again to create the next term which continue from the first term you created. For our case, the first term is for the year of 2021 which starts 1-Jan-2021 and ends on 31-Dec-2021. This next term will starts on 1-Jan-2022 and ends on 31-Dec-2022. For easier manageability purpose, we name this two term just by the year number.
Assign Next Term in the First Term
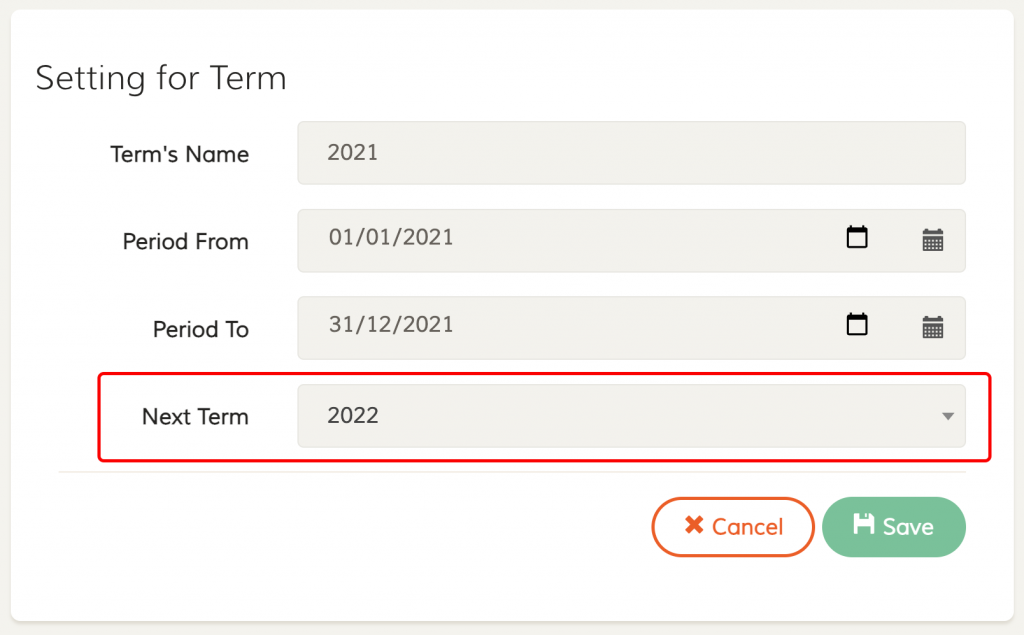
Open back the first term you just created and click Select Next Term, select the next term you just created and click Save. In our case, our first term is 2021 and our next continuity term is 2022, hence in 2021, we select 2022 for our next term.
NOTE: this next term is to be used when you upgrade any subscriptions. The next subscription will automatically select this next term when you upgrade to reduce manual selection.
Base on your requirement, you can continue to create the next term and edit the previous one to add the new next term.
Assigning Term to Subscriptions
Assigning term is automatic when you create new subscription after you have setup the terms. The term will be automatically selected based on the start date you pick.
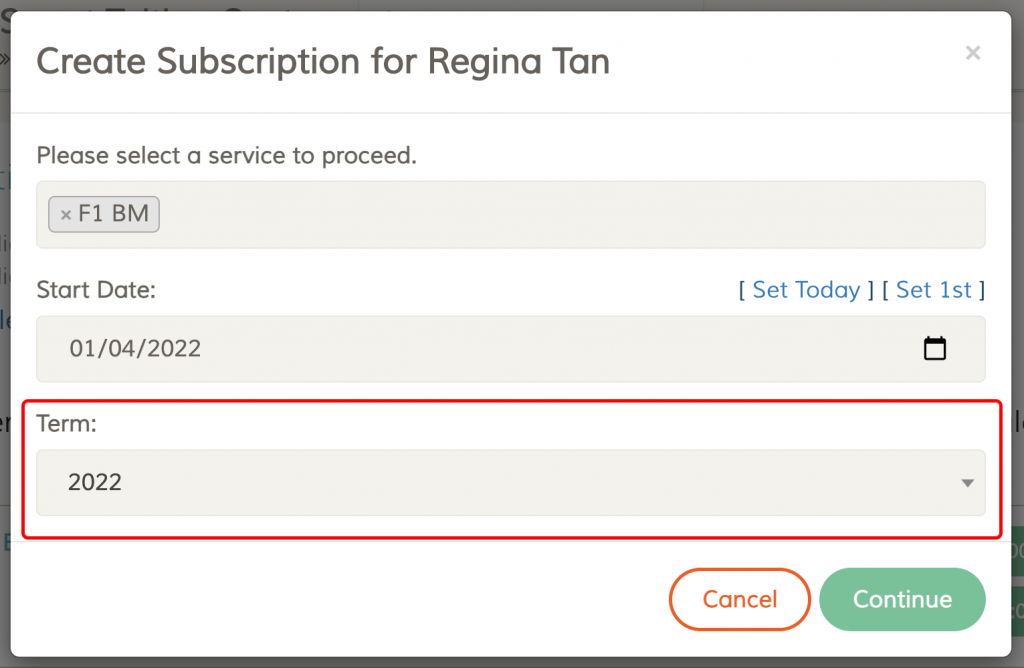
However, if you have created subscription before you setup the terms, you can easily assign it in the customer page’s subscriptions section.
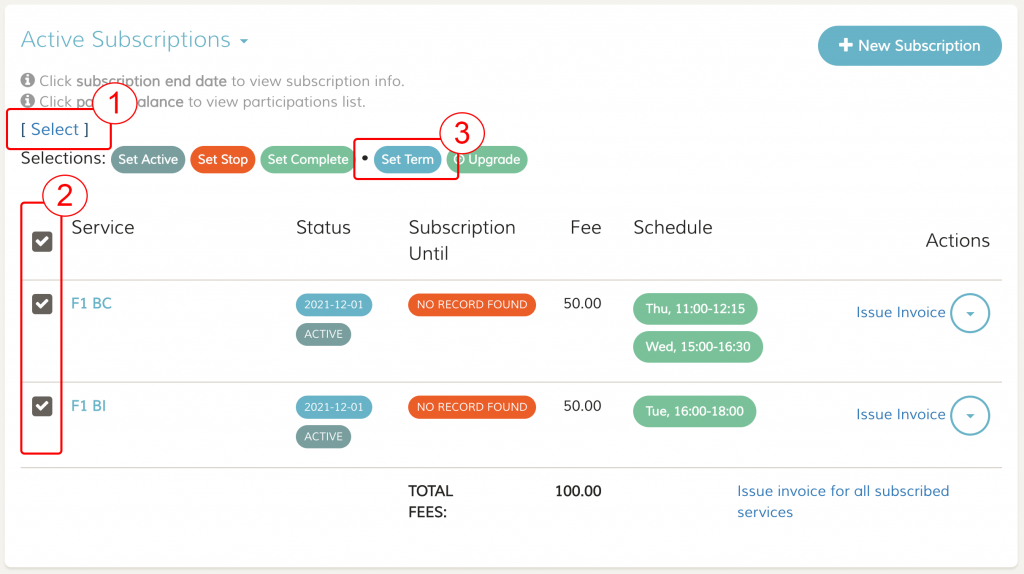
Go to the customer page that you would like to assign her subscription a term, scroll down to subscriptions section:
- Click on the Select link
- Select the subscription you would like to set the term
- Click Set Term to set their term
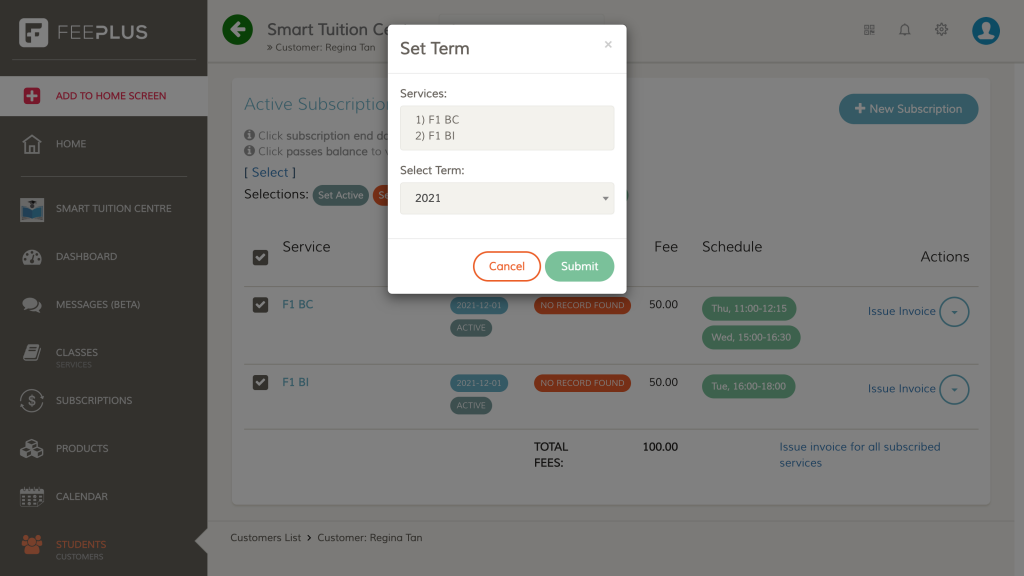
A dialog box will shown, select the term in Select Term selection box and click Submit.
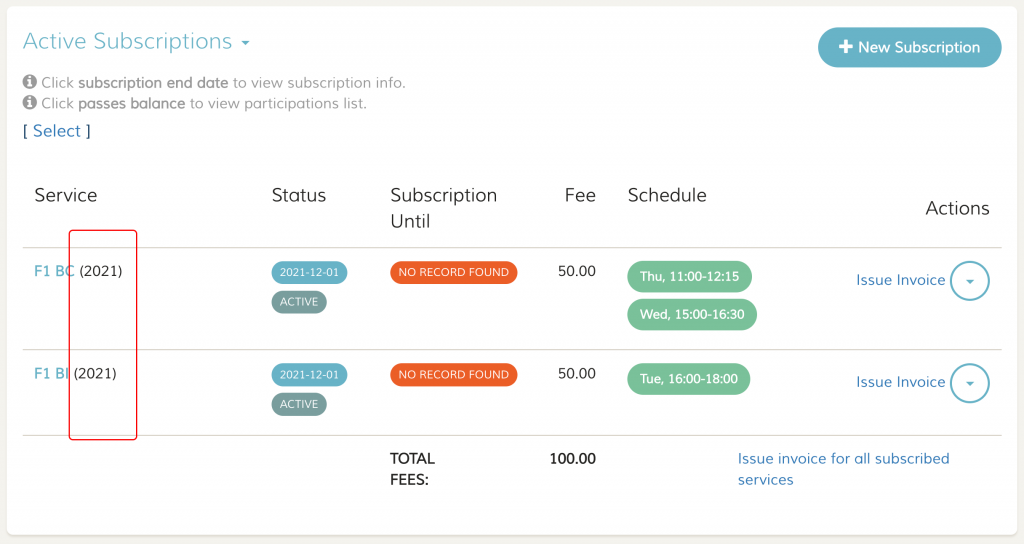
When the term is set, it will shown next to the service name in the subscriptions list.
Usage
1. Easily Differentiate Multiple Subscriptions
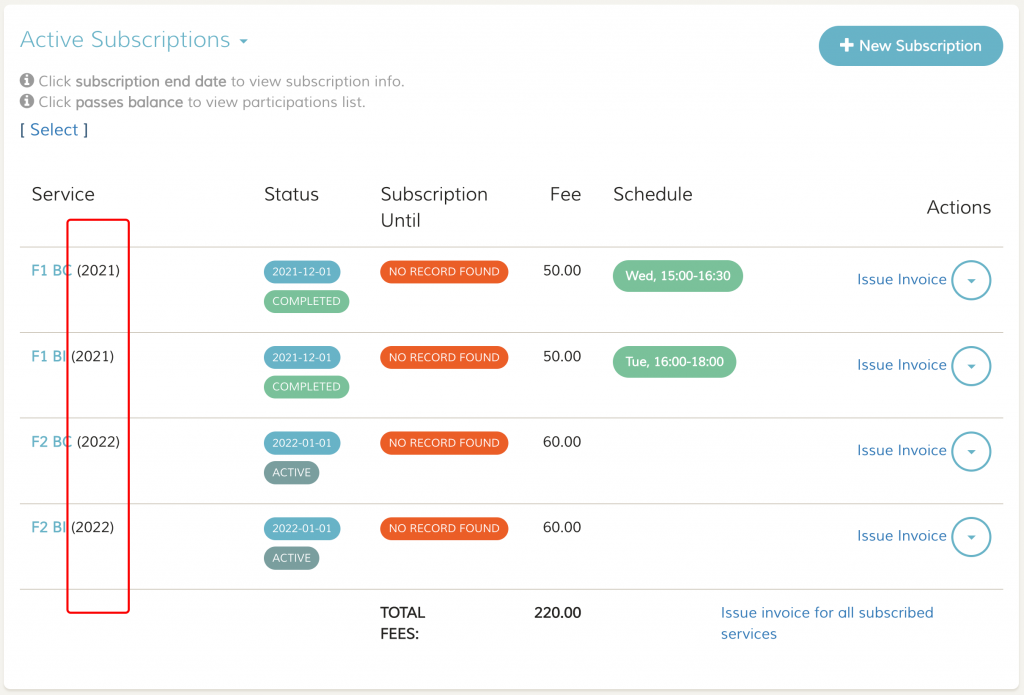
When a customer / student has multiple subscriptions, term can be used to easily differentiate those subscriptions. For the example above, we can easily know that the F1 BC and F1 BI are for the 2021 term, and F2 BC and F2 BI are for the 2022 term. The term are best to distinguish the same subscriptions but subscribed for different terms.
2. Upgrade Subscriptions
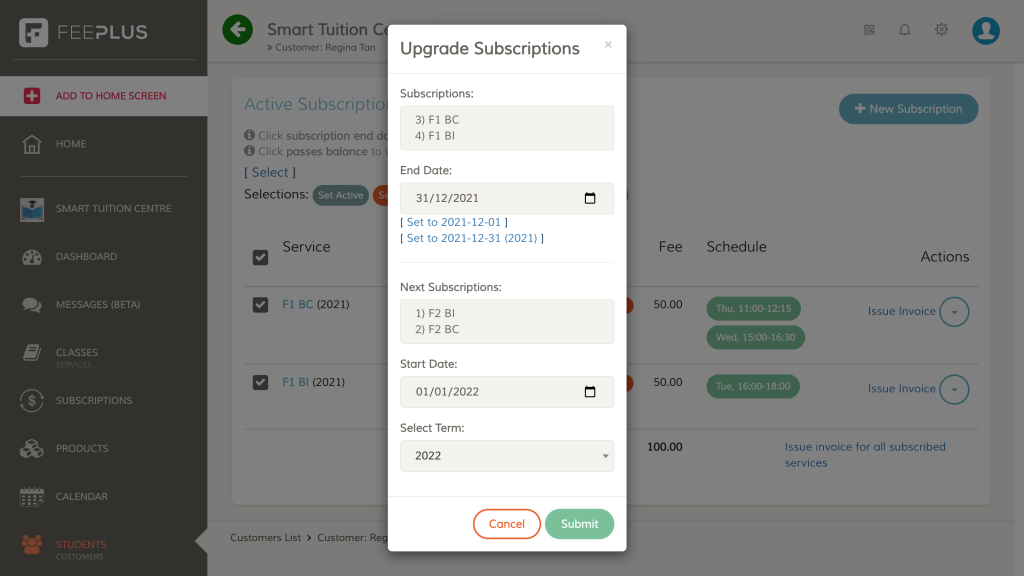
When upgrading subscriptions with term, FeePlus will automatically set the term’s ending date for the completing subscription and select the next term and set the start date for the upgraded subscription. This automation increase productivity and reduce error while performing subscriptions’ upgrading activity.
Also, when performing subscriptions’ upgrade in bulk, FeePlus requires you to select the term for which subscriptions require an upgrade. The wizard will automatically upgrade the selected term’s subscriptions to the next term. Hence, if you wish to upgrade subscriptions in bulk, make sure you have setup the terms for all the subscriptions you wish to upgrade.
